


Fender Hot Rod Deluxe LT supply Ultimate fix
£30.00
Description
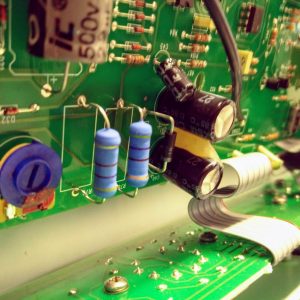
The most common fault in a Fender Hot Rod Deluxe is the overheating of the PCB due to the LT supply zener diodes and dropper resistors. If the problem is caught in time, then the components can be replaced and mounted with clearance from the board to allow them to get hot without burning the PCB. Please note: For basic HRD repairs, I’d recommend The HRD repair kit. However if your PCB is badly damaged, keep reading…
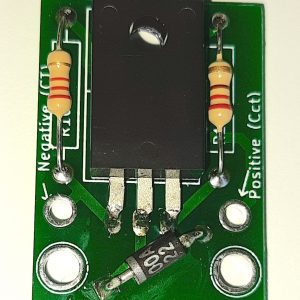
Sometimes I find that the PCB is too badly burnt for this to be possible. In these cases I use this LT PCB to remount the LT supply dropper resistors and zeners off the board.
This PCB is also a better approach for amps that are left on for long periods eg guitar teachers or rehearsal studio amps.
This LT PCB improves upon the original in many ways:
- High quality FR4
- 2 sided PCB improves heat dissipation.
- Large copper pours to and bottom side to improve heat dissipation
- 10W effective power dissipation, rather than 5W stock components (2x 5W resistors)
- Plated through holes secure components firmly
- Components mounted away from PCB
- Multiple +16 and -16V terminals for problematic scenarios
To fit the PCB:
- Remove the original zener and dropper resissors from the HRD board.
- Drill a small 2.7mm hole (2.5mm will do) in the chassis on the right hand side of the HRD chassis to mount the PCB
- Attach the +HT, -HT, +LT and -LT and GND wires to the LT PCB as indicated on the board silk print.
- Retrack any damaged areas on the HRD PCB
- If necessary, cut the high voltage trace between R75 and R74 and remake the connection with wire. This can sometimes conduct to the 16V traces when the PCB is badly burnt.
- Fix the LT PCB in place using the provided M3 x 10mm taptite screw, nylon washer and nylon spacer
- The nylon washer goes on top of the PCB (see photo)
- The nylon spacer goes underneath (see photo)
- Attach the flying wires to the main HRD PCB, making sure to connect the +HT, -HT, +LT and -LT in the appropriate place. Please note that there’s no standard place to connect them, this will depend upon the level of damage to the unit under repair. It is ESSENTIAL to connect these correctly, first time, so double and triple check (see note below)!
The board is also useful for Marshall JCM900, Carlsbro, HH VS Musician, HH IC100, MusicMan and many other designs using overheating board mounted circuits.
Important: This modification is more difficult than the basic Hot Rod repairs. You need to be able to trace the HRD PCB traces to work out where to connect the LT PCB. Since the level of burn damage can vary, it’s not possible for this board to come with a guide. Connecting this PCB wrongly may destroy the opamps that control channel switching, FX loop and reverb. I can’t offer advanced help with this repair by email, but you’re welcome to post the HRD chassis to Keld Ampworks for repair.
Related products
-
High Voltage HT Dropper circuit
£45.00 Add to basket -
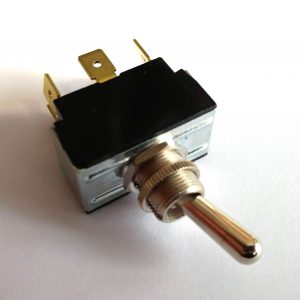
Vintage Marshall style Toggle switch for standby
£10.50 – £11.50 Select options -
Fender Hot Rod Deluxe Repair Kit (also Blues Deluxe, Hot Rod Deville and Blues Deville)
£9.50 – £39.75 Select options -
Replacement PCB for Trace Elliot Bipolar Bear or 300W MOSFET.
£229.00 Select options
Reviews
There are no reviews yet.